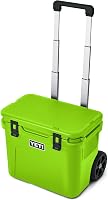
Camping Coolers: Hard, Wheeled and Soft Picks Explained
The best cooler for camping is the one you can move comfortably with enough room for food and ice. Choose YETI for a fixed camp setup, Coleman for rolling larger loads, RTIC for smaller hard-sided loads, or Maelstrom for folding storage.
On this page (9 sections)
- Which type is the best cooler for your camping trip?
- How much space should the best cooler for your trip have?
- Which cooler fits your carrying route and vehicle?
- Which camping cooler examples suit different buyers?
- How should you prepare and pack a camping cooler?
- How should you manage food and ice during the trip?
- How do you clean and store a cooler after camping?
- Which buying and packing mistakes should you avoid?
- Which best cooler should you choose for your next trip?
The best cooler for camping fits your food and ice, your vehicle, and the route to camp. Choose YETI for a fixed setup, Coleman for rolling a larger load, RTIC for a smaller hard-sided load, or Maelstrom for folding storage.
Start with your hardest task: lifting a full cooler, keeping meals organized, crossing a long parking area, or finding storage space at home. Solve that problem first, then compare insulation and capacity.
This guide explains which style fits each job and how to pack it well. For a broader shortlist of models, see our best coolers for camping guide.
Which type is the best cooler for your camping trip?
A hard cooler suits a fixed camp, wheels help move a bulky load, and a folding soft cooler works well for compact storage. Choose the style around your route and food plan before comparing maximum capacity.
| Cooler style | Choose it for | Main trade-off |
|---|---|---|
| Hard cooler | A firm case for meals and organized camp storage | You must lift the shell plus everything inside |
| Wheeled hard cooler | Moving a larger load along a suitable path | Wheels don't solve stairs or vehicle loading |
| Collapsible soft cooler | Short outings, flexible carrying and limited storage | The bag needs careful packing to support containers |
A wheeled cooler is still a hard cooler in this comparison. Its key difference is how you move it, rather than a separate approach to keeping food cold.
Drive-up camping with meals prepared at home
Choose a hard cooler when you'll unload near camp and keep most meals in one place. A firm shell makes it easier to arrange containers without the bag changing shape around them.
Check your meal containers before choosing a model. A wide lunch box or tall bottle can be awkward even when the cooler's overall capacity looks generous.
Campsites reached by a path
Choose wheels if most of the route is suitable for pulling a load. Walk through the whole journey in your head, including parking barriers, curbs and the final approach to your pitch.
If you must carry the cooler over several obstacles, a smaller load may be easier than a large wheeled case. Plan who will help before filling it.
Day outings and limited storage
Choose a collapsible soft cooler when the main job is carrying a modest picnic or keeping groceries cold on the way to camp. Folding storage helps if a rigid box would crowd a small closet.
A shoulder strap keeps your hands available, but it doesn't remove the load from your body. For a long walk, pack only what you need and include the weight of cooling supplies.
How much space should the best cooler for your trip have?
Choose capacity around meals plus ice, rather than a can count alone. The right size holds your actual containers while leaving enough room for cooling supplies.
Start with a simple meal plan. Count breakfasts, lunches and dinners that need refrigeration, then add drinks, snacks and any food you'll bring home.
Dry foods can travel separately. Keeping bread, unopened shelf-stable snacks and utensils outside the cooler saves cold space for ingredients that need it.
Compare can counts on the same basis
Can counts describe a packing arrangement, not a full camping menu. Check the can size and whether the count includes ice before comparing models.
The YETI Tundra 45 holds 26 cans with a 2:1 ice-to-contents ratio, or 54 cans without ice. Those figures describe different loads, so they shouldn't be treated as interchangeable.
For ice planning, read how much ice a cooler needs. Leaving cooling space is more useful than filling every gap with drinks.
Measure containers, not just total volume
Measure the widest food container and the tallest bottle you expect to pack. Include lids and allow enough clearance to close the cooler without pressing on the load.
Stack your planned containers on a table before shopping. This reveals awkward shapes, wasted space and items that could move into smaller sealed containers.
Outside measurements matter separately. Thick walls, handles and wheels take up vehicle space without adding room for food.
Account for the return trip
Choose a size that also works with leftovers and partly used packages. A cooler packed tightly on departure can become disorganized as containers are opened and moved.
Bring a few clean, food-safe containers for leftovers. They help keep loose packaging out of the meltwater and make the remaining food easier to find.
Which cooler fits your carrying route and vehicle?
Choose the cooler you can load, move and unload when full. Empty weight is only the starting point, since ice, drinks and food can make any style demanding to lift.
Measure the vehicle opening as well as the space inside. A cooler may fit in the cargo area but be difficult to pass through a narrow hatch or lift over a high sill.
Check lid clearance where you expect to use it. If you must unload the whole car to reach lunch, the packing arrangement needs work.
Decide where wheels will help
Wheels are most useful when they replace a meaningful part of the carry. They offer less help when the journey consists mainly of lifting into a trunk and crossing a few steps.
Loose surfaces increase pulling effort. Even a wheeled model described for outdoor terrain needs a realistic route with enough room to turn.
Our hard versus soft cooler guide explains the carrying trade-offs if you're still deciding between a rigid case and a bag.
Plan the lift before adding ice
Set the empty cooler near the vehicle and decide where each person will stand. Clear loose gear from the loading area so you aren't trying to balance a full cooler around obstacles.
If the packed load will be too much, reduce it or split supplies between containers. Don't assume a cooler described as portable will be comfortable for every person.
A shoulder bag also needs a lift plan. Check that you can put it down safely without tilting food containers or dragging the base across sharp ground.
Which camping cooler examples suit different buyers?
Choose YETI for a fixed camp setup, Coleman for rolling larger loads, RTIC for smaller hard-sided loads, or Maelstrom for folding storage. Each solves a different packing or transport problem.
These choices compare construction, capacity, carrying features and storage needs. Ice duration claims remain brand claims, rather than a shared measure of performance between these models.
YETI Tundra 45: for organized meals at a fixed camp
Choose the YETI Tundra 45 if you want a rotomolded shell, separate dry storage and tie-down points for transport. It makes the most sense when you can place the cooler near camp and leave it there.
It has up to 3 in of PermaFrost insulation and a freezer-style rubber gasket. YETI ties cooling performance to pre-chilling, ice quality, packing ratio and limited lid openings.
The included dry goods basket keeps snacks above meltwater. Use it for items you want to reach quickly, while keeping sealed meal containers arranged below.
Molded tie-down slots give you attachment points for straps or rope during transport. Secure the cooler to suitable vehicle anchor points and keep the lid accessible if you'll need food during a stop.
The stated interior measures 18.3 x 9.4 x 10.7 in, with 10.7 in of height. Its narrow interior width deserves attention if you use broad meal-prep boxes.
Who should buy it: campers who organize several meals in advance and value a firm shell and storage basket. It also suits trips where securing the cooler during travel is part of the plan.
Who should skip it: anyone whose main need is folding storage or rolling a load from the parking area. Those problems call for different features.
For setup, arrange the basket and food boxes before adding ice. Make sure the gasket area is clear and the rubber latches close without forcing an overfilled lid.
The drain lets you empty meltwater without tipping the case. Check that the plug is secure before loading the cooler into your vehicle.
See our YETI Tundra 45 review for a closer look at its features and trade-offs.
Coleman Xtreme Rolling Cooler: for larger loads on a rollable route
Choose the Coleman Xtreme Rolling Cooler when moving food and drinks from the car is the main challenge. Its wheels and retractable telescoping handle address that job directly.
This model holds up to 84 cans. Allow separate room for ice and meal containers rather than treating that maximum as a ready-made camping load.
Coleman describes the wheels as suited to sand, gravel and grass. Deep loose sand, steep slopes and obstacles can still make pulling a full cooler difficult.
The empty cooler weighs 12.7 lb. Its outside dimensions are 22.6 x 17.6 x 17.5 in, so measure the cargo opening and leave space for loading around it.
Coleman says the insulated body and lid can keep ice for up to 5 days in temperatures as high as 90°F. Build your food plan around temperature checks and access to replacement ice.
Who should buy it: car campers, picnic groups and tailgaters with a larger load and a suitable path. It is especially useful when wheels replace a long carry.
Who should skip it: campers facing stairs, narrow trails or repeated lifts. Wheels add little value if most of your route requires carrying.
The lid supports up to 250 lb as an extra seat. Keep the cooler on firm, level ground and avoid arranging camp so someone must move every time you need a drink.
After the trip, the leak-resistant drain helps empty meltwater without lifting the full case. Clear dirt from the wheels before rolling it into storage.
For more options, see our guide to the best wheeled coolers.
RTIC 32 Ultra-Light: for smaller hard-sided loads
Choose the RTIC 32 Ultra-Light when you want a rigid cooler for a smaller packing list. Its 32 qt capacity and 14.7 lb empty weight suit buyers trying to keep the overall load manageable.
RTIC says it's more than 30% lighter than rotomolded coolers of the same capacity. That comparison applies to similar-capacity rotomolded models, so it doesn't mean this cooler is lighter than every alternative.
It uses up to 2.5 in of closed-cell foam insulation. RTIC gives separate maximum capacities of 48 cans or 30 lb of ice, rather than those quantities together.
The interior measures 17.5 x 11 x 9.75 in. Check tall bottles carefully, since usable height can decide whether your preferred drink containers fit upright.
Who should buy it: campers with a short meal plan who want a hard shell without moving into a larger case. It also fits outings where one person will handle a carefully limited load.
Who should skip it: groups needing a large shared food supply or anyone relying on wheels. Overpacking a smaller cooler leaves too little room for cooling supplies.
For setup, use food containers that fit the interior shape and keep them below the lid line. Reduce unnecessary packaging before departure so you don't spend camp time rearranging the load.
RTIC specifies hand washing for this cooler. Clean it after each trip and let the interior dry fully before closing it for storage.
Read our RTIC Ultra-Light 32 review for more on its size and carrying trade-offs.
Maelstrom 30/40 Can Soft Cooler: for day trips and folding storage
Choose the Maelstrom soft cooler when storage space and carrying options matter more than having a rigid case. The version covered here is the 22 L bag sized for 30 cans of 330 ml.
Its name covers more than one capacity, so use the 30-can version's measurements for planning: 14.43 x 8.97 x 10.14 in. Don't assume every version has the same usable space.
The bag weighs 0.82 kg and has a detachable, adjustable shoulder strap, a top handle and side handles. Choose the carrying method that keeps the packed bag level.
Maelstrom says its 5-layer design keeps items cold for up to 24 hours with ice. That makes day outings the clearer use here, rather than trips built around several days without fresh cooling supplies.
The bag has front, side and back pockets plus a detachable bottle opener. Keep small dry items outside the main compartment so you don't open it just to find a utensil.
Who should buy it: picnic users, grocery shoppers and campers who want a smaller secondary cooler that folds away. It also suits homes where a rigid chest would take up too much space.
Who should skip it: buyers needing a firm case for stacking heavy gear or a large shared meal supply. A flexible bag needs more care when arranging upright containers.
Keep sharp package corners away from the liner and support food containers with a balanced load. Carry the bag upright rather than treating its leakproof construction as permission to tip it over.
Empty, clean and dry the bag before folding it. Packing it away damp can leave moisture trapped in folds.
Our best soft coolers guide compares more options in this style.
How should you prepare and pack a camping cooler?
Start with a cool interior, chilled food and a clear packing order. Adding warm groceries to a warm cooler spends ice cooling the load before it can maintain the temperature.
Prepare as much food as practical at home. Portion ingredients into sealed containers so you aren't opening large packages or handling raw food beside ready-to-eat snacks.
Pre-chill before the final pack
Cool the interior before departure using spare ice or cold packs. Remove any meltwater from that step, then add the ice intended for the trip.
Chill drinks and perishable food in the refrigerator first. Frozen food can help the cold load when it suits your meal plan, but allow for thawing time before cooking.
Pack close to departure. Leaving a filled cooler in a warm vehicle while you finish other tasks wastes part of your cooling supply.
Put meals in the order you'll use them
Place later meals lower in the cooler and the next meal where you can reach it. Keep an easy-to-read meal list outside so you don't need to search with the lid open.
Use sealed containers for raw meat and keep them separate from ready-to-eat food. Arrange them so a leak won't drip onto snacks or other open food.
Keep food that must stay dry above meltwater in suitable containers or storage space. Ice bags and food packaging can shift during travel, so check the arrangement when you arrive.
Separate frequent access from meal storage
Use a separate drink cooler when a group will reach for beverages all day. This reduces repeated openings of the cooler holding meals.
For smaller outings, group drinks in one easy-to-reach area instead. You shouldn't need to lift out dinner ingredients every time someone wants water.
Keep the cooler shaded and close the lid promptly after each use. The guide to keeping ice longer in a cooler explains the packing and use habits that help.
How should you manage food and ice during the trip?
Monitor food temperature and the remaining cooling supply, then replenish ice before the cooler becomes warm. A brand's ice duration claim doesn't replace checking conditions during your own trip.
Keep perishable food at 40°F or below using a thermometer. A few remaining ice cubes don't confirm that every part of the load is cold enough.
Plan a refill before you need one
Find out where you can get fresh ice along your route or near camp. Remote trips need a more cautious food plan than campsites near a store.
Schedule meals around the food you can keep cold. Shelf-stable backup meals reduce pressure if access to ice changes.
Avoid adding a large batch of warm drinks midway through the trip. Chill replacements first when possible, or cool them separately from perishable food.
Handle meltwater without soaking the food
Keep food packages sealed and check that containers remain above or protected from meltwater. Cold water can remain part of the cooling load while food stays properly contained.
Drain when needed to prevent overflow, remove dirty water or make room for fresh ice. Direct the water away from paths and follow campsite disposal rules.
For more detail on changing weather, packing and lid use, read how long ice lasts in a cooler.
How do you clean and store a cooler after camping?
Empty, wash and fully dry the cooler before putting it away. Leaving food residue or moisture inside creates a cleanup problem for your next trip.
Remove baskets, loose ice and packaging so you can reach corners and seams. Follow the cooler's care directions and use gentle cleaning tools that won't damage the liner or seals.
Wash the interior with mild soap and water, then rinse away residue. Clean the drain opening and plug separately if the design allows it.
Wipe handles, latches and the exterior too. Mud and food residue can collect on the parts you touch while packing meals.
Let the lid or bag remain open until the inside is dry. Dry removable parts separately, and don't fold a soft cooler while moisture remains in its creases.
Before the next outing, check closures, straps, handles and drain plugs. Deal with damage before adding food and ice.
For a more detailed cleanup routine, follow our guide to cleaning a cooler and removing smells.
Which buying and packing mistakes should you avoid?
Avoid buying extra capacity without a transport plan or filling the cooler without reserving space for ice. Most practical problems begin before the trip.
Choosing a large cooler for occasional group use
Buy around the trips you take most often. A large cooler can be awkward on routine outings if it leaves you carrying a bulky shell for a small lunch.
For occasional gatherings, consider splitting supplies between your usual cooler and another suitable container. This also gives you more freedom to separate drinks from meals.
Treating thick insulation as the whole decision
Choose insulation alongside interior shape, carrying needs and access to ice. Thick walls don't help if your food boxes won't fit or the full cooler is too difficult to move.
The rotomolded cooler guide explains that construction style. Use it to understand the shell rather than assuming every hard cooler serves the same buyer.
Confusing dry storage with cold storage
Keep perishable food within the chilled space even when it needs protection from water. A dry pocket or raised position alone doesn't establish a safe food temperature.
Use sealed containers and monitor conditions. Don't move refrigerated ingredients into an exterior pocket simply to free up room.
Forgetting the final few feet
Check where the cooler will rest at camp. Sloped ground, a low table or a tight gap can make daily access awkward even after an easy journey.
Set it where the lid opens fully and the drain remains reachable. Keep its access path clear of chairs, guy lines and cooking equipment.
Which best cooler should you choose for your next trip?
Choose the best cooler around your main constraint: organized meal storage, moving a large load, limiting bulk, or storing the cooler at home. Then confirm that your meals and ice fit together.
- Choose YETI for a fixed camp setup where the rotomolded shell, basket and tie-down points earn their space.
- Choose Coleman when a suitable path lets wheels replace a long carry with a larger load.
- Choose RTIC for a smaller hard-sided packing plan that you can lift comfortably when full.
- Choose Maelstrom for day outings or a secondary cooler that folds away after use.
Before ordering, measure one planned load of containers and the vehicle opening. That check can settle the decision faster than comparing maximum can counts.
If your trip still needs a clearer food, transport or refill plan, use our guide to choosing a cooler for camping to work through those decisions.
Frequently asked questions
What type of cooler is best for camping?
A hard cooler suits a fixed camp setup, a wheeled cooler helps move a large load, and a collapsible soft cooler saves storage space. Choose around the food and ice you need, then check the route from your vehicle.
A cooler that fits your meals but is difficult to move creates extra work.
Is a hard or soft cooler better for camping?
Choose a hard cooler for a firm case that supports organized food storage, or a soft cooler for flexible carrying and folding storage. Trip length alone doesn't settle the choice.
Compare usable space, loaded weight and your access to fresh ice before choosing the style that fits your camping routine.
Are wheeled coolers good for camping?
Wheeled coolers are useful when a loaded cooler must travel along a route you can pull it across. Check for stairs, deep sand, roots and narrow gaps before choosing wheels.
You'll still need a plan for lifting the cooler into your vehicle and moving it across sections where rolling isn't practical.
How do I choose the right cooler size?
Choose a cooler that holds your planned meals, drinks and cooling supplies without forcing you to remove ice. Check usable interior dimensions against your largest containers, then measure vehicle space for the outside shell.
Our guide to choosing a cooler size explains how to turn a meal plan into a practical capacity choice.
How can I keep ice longer in a camping cooler?
Pre-chill the cooler and its contents, pack enough ice, and keep the lid closed between uses. Place the cooler in shade and organize food so you can find it quickly.
Use a thermometer for perishable food, since remaining ice and a brand's time claim don't confirm the temperature throughout the cooler.